

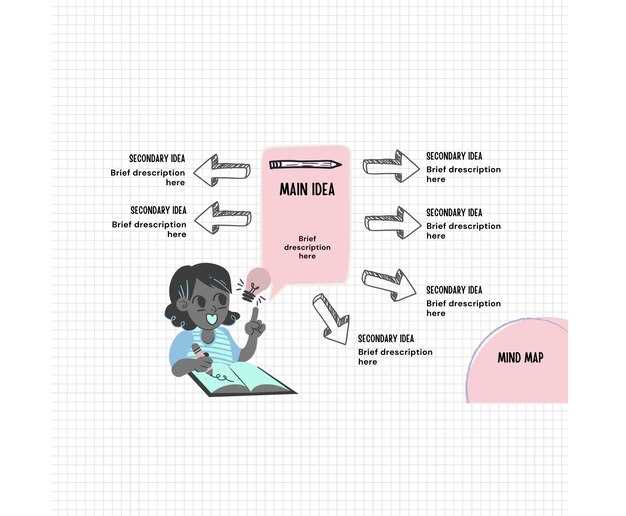
Organize your ideas clearly by starting with a mind map. This visual tool helps you brainstorm and connect thoughts without feeling overwhelmed. For example, place your main topic in the center and branch out with supporting points, creating a clear structure for your essay.
Use a Venn diagram to compare and contrast ideas effectively. This method highlights similarities and differences, making your arguments more precise. For instance, when analyzing two characters in a novel, a Venn diagram ensures your points are well-defined and easy to follow.
Try a flowchart to map out the sequence of your essay. This approach keeps your writing logical and ensures each paragraph transitions smoothly. If you’re explaining a process, a flowchart helps you stay on track and avoid missing key steps.
Graphic organizers save time and reduce stress by breaking down complex tasks into manageable steps. They’re especially helpful for students who struggle with organizing their thoughts or meeting deadlines. Start with one tool today and see how it transforms your writing process.
How to Choose the Right Graphic Organizer for Your Essay Type
Match the graphic organizer to your essay’s purpose. For argumentative essays, use a T-chart to list pros and cons or a Venn diagram to compare opposing viewpoints. Narrative essays benefit from story maps or timelines to outline events in sequence. For expository essays, try a cause-and-effect chart or a flowchart to show relationships between ideas.
Consider the complexity of your topic. Simple topics work well with basic organizers like mind maps or bubble charts, which help brainstorm ideas. For more detailed essays, hierarchical organizers or multi-column charts allow you to break down subtopics and supporting evidence clearly.
Think about your audience. If your essay targets visual learners, use diagrams or infographic-style organizers to make information easier to grasp. For analytical essays, matrix organizers help categorize data and highlight patterns effectively.
Test different formats before finalizing. Sketch a few organizers to see which one aligns best with your essay’s structure. This ensures your ideas flow logically and your argument stays focused.
Step-by-Step Guide to Structuring Essays Using Graphic Organizers
Choose a graphic organizer that matches your essay type. For argumentative essays, use a T-chart to list pros and cons. For narrative essays, try a story map to outline plot points.
- Identify your main idea or thesis statement. Write it at the top of the organizer to keep your focus clear.
- Break your essay into sections. Use boxes or bubbles to represent the introduction, body paragraphs, and conclusion.
- Add supporting details. Under each section, include key points, evidence, or examples to strengthen your argument.
- Connect ideas logically. Use arrows or lines to show relationships between concepts, ensuring a smooth flow.
- Review and revise. Check if your organizer covers all necessary points and adjust as needed before writing.
Experiment with different organizers like Venn diagrams for comparisons or flowcharts for process essays. Find what works best for your writing style.
- Keep your organizer simple and easy to read. Avoid overcrowding with too much text.
- Use colors or symbols to highlight important points or transitions.
- Practice regularly to make organizing essays faster and more intuitive.
Graphic organizers save time, reduce stress, and help you create well-structured essays with confidence.
Common Mistakes to Avoid When Applying Graphic Organizers
One common error is overloading the organizer with too much information. Stick to key points to maintain clarity and focus. Crowding the layout confuses the reader and defeats the purpose of simplifying ideas. Keep it concise and relevant.
Another mistake is ignoring the structure of the organizer. Each type, like Venn diagrams or flowcharts, serves a specific purpose. Using the wrong format for the task can lead to disorganized thoughts. Match the organizer to your writing goal for better results.
Avoid applying graphic organizers without practice. Test different formats to see what works best for your essay. Experimenting helps you identify the most effective way to present your ideas. Refine your approach as you go.
Neglecting revisions is also a pitfall. Review the organizer after filling it in to ensure it aligns with your essay’s flow. Make adjustments if connections between points are unclear. This step strengthens your argument and improves coherence.
Lastly, don’t rely solely on the organizer. Use it as a tool to guide your writing, but ensure your essay has depth and detail. The organizer should complement, not replace, thoughtful analysis and development of ideas.
Practical Tips for Teachers to Implement Graphic Organizers in the Classroom
Introduce graphic organizers gradually by starting with simple formats like Venn diagrams or T-charts. This helps students get comfortable with the concept before moving to more complex structures like flowcharts or concept maps.
Model the use of graphic organizers during lessons. Show students how to fill them out step-by-step, explaining your thought process as you go. This builds confidence and clarifies expectations.
Tailor organizers to specific tasks. For example, use story maps for narrative writing, cause-and-effect charts for science experiments, or timelines for historical events. This ensures the tool aligns with the learning objective.
Encourage collaboration by having students work in pairs or small groups to complete organizers. This promotes discussion, critical thinking, and peer learning.
Provide templates for students to use independently. Keep them accessible in a designated folder or digital platform so students can choose the right organizer for their needs.
Incorporate technology by using digital tools like Google Drawings, Canva, or specialized apps. These platforms allow for easy editing, sharing, and creativity.
Use graphic organizers for assessment. Ask students to complete them as part of a project or test to evaluate their understanding of a topic.
Give feedback on completed organizers. Highlight strengths and suggest improvements to help students refine their skills over time.
Experiment with different formats to keep students engaged. Try mind maps, KWL charts, or fishbone diagrams to add variety and cater to different learning styles.
Reflect on the effectiveness of the organizers with your students. Ask for their input on what works best and adjust your approach based on their feedback.
Need this essay done?
A degree-holding writer handles any essay type, any subject, from $11 per page. Original work, on time.
Get Expert Help